Blog Archive: August 2016
Gravel and Crushed Stone For Foundation
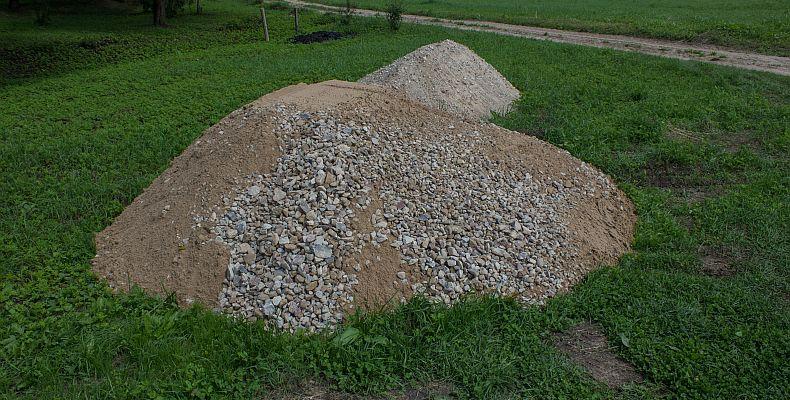
This Summer I will need a lot of gravel and crushed stone for home remodeling tasks, mainly for foundation sealing works.Some time ago (while digging a pond), I negotiated a few cubic meters of gravel from neighbor, who was sealing surface of the road meanwhile, it turned out that neighbors' gravel was not ideal for foundation as it consisted from clay particles, and we decided re-use clay/gravel for rock garden instead. I had no chance but to look for other source for gravel and crushed stone. I found a gravel quarry and ordered a load of gravel and crushed stone. Today I got the delivery. Cool. Pile of gravel and crushed stoneIn total it's about 3 cubic meters of gravel…

Sponge Cake With Wild Berries
Here comes another post on food blogger series, and again I must admit I'm not the original creator of following sponge cake, my better part is.
Sponge cake with wild berries
Really cool cake, here is photos and cooking directions:
Biscuit dough:
4 eggs, 4 tbs. flour, 4 tbs. sugar
Cooking directions:
Separate egg white form the egg yolk. Whip egg white to hard foam. Separately whip yolks with 4 tablespoons of sugar. Fold into the egg yolks Whipped egg whites and flour. Bake for about 10-15 minutes in 180-200 degrees. When done baking cut into 3 equal parts.
Cream: Sweet cream with vanilla and sugar.
Between the layers of sponge smear…
Digging a trench around existing foundation - Building a bathroom from scratch - part 4
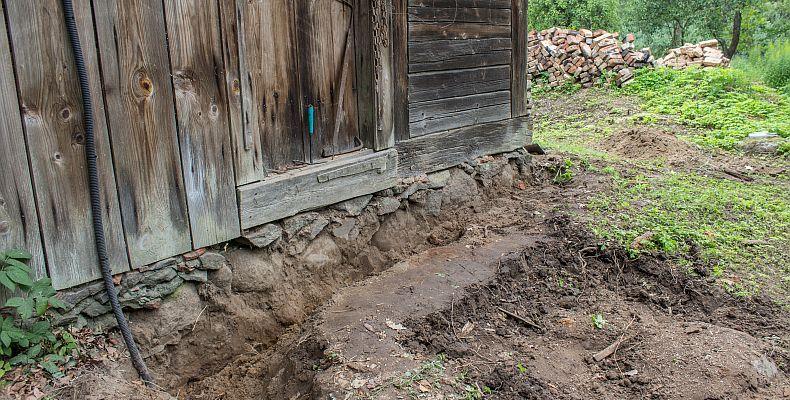
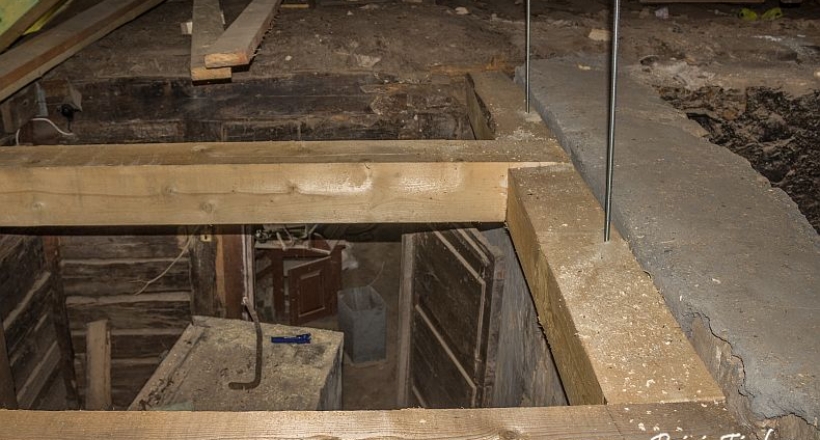
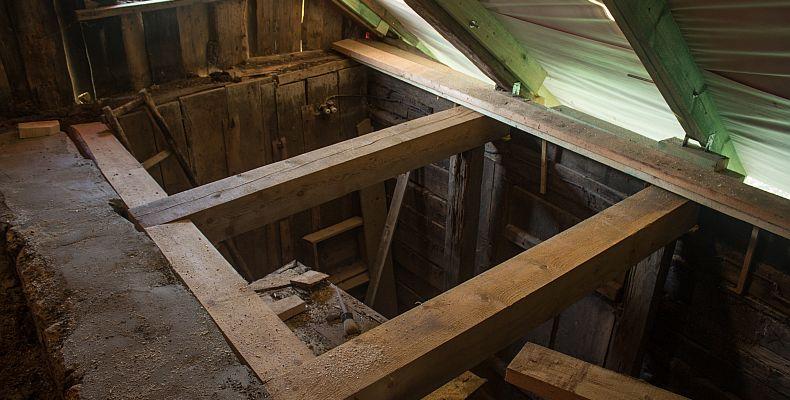
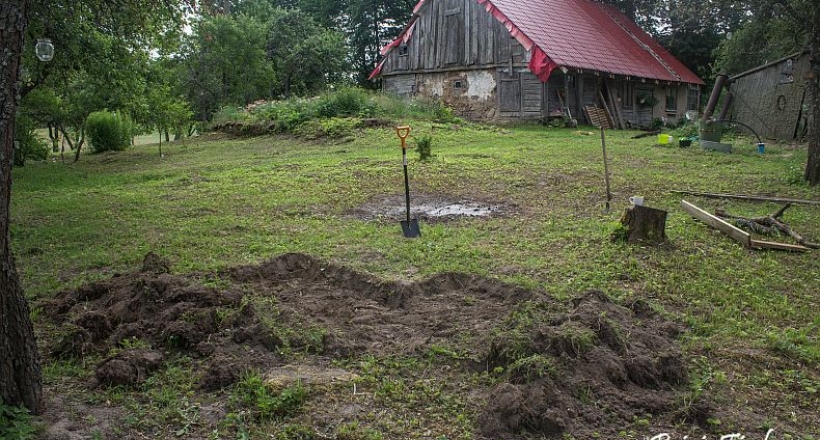
Here comes another update on building a bathroom from scratch series in project home remodeling. The thing is - the house we got didn't pamper us a lot, and so for example I had to install new supporting beams, not to speak about changing a roof, prior to before ever dreaming about having a bathroom. OK, I had a vision about a bathroom once we replaced roof last year, but to actually feature bathroom, we have to build many new things, among them - completely replace old and rotten wood beams with AAC blocks.Sealing old foundation is one of the top priorities before building new AAC walls. Today I took the shovel and started digging:Searching for a basementAnother reason I wanted to dig…
Concreting Foundation For a Garden Pizza Oven - Part 2
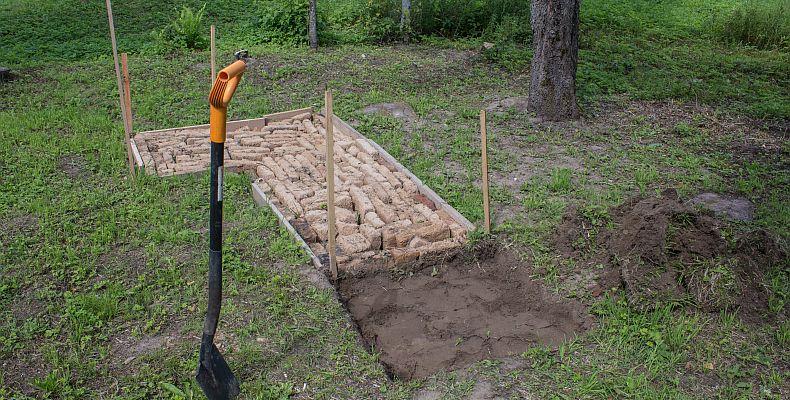
This Summer I excelled in concreting works, the major concreting works involves concreting stone wall inside our rural country house and concreting house foundation (more on that in upcoming posts from home remodeling series)In spare time from major home reconstruction works this Summer we decided to build a cool and fancy garden pizza oven, connected with a water supply (sink) and electricity - making a cool outdoor kitchen with a lot of space for not only baking pizzas but doing some other exciting things.Some time ago I built a foundation form using old clay bricks from chimney we took down inside house. It took me some 2 weeks before I continued works on garden pizza oven, and today I…
Forest Mushrooms - Penny Bun & Red-Capped Scaber Stalk
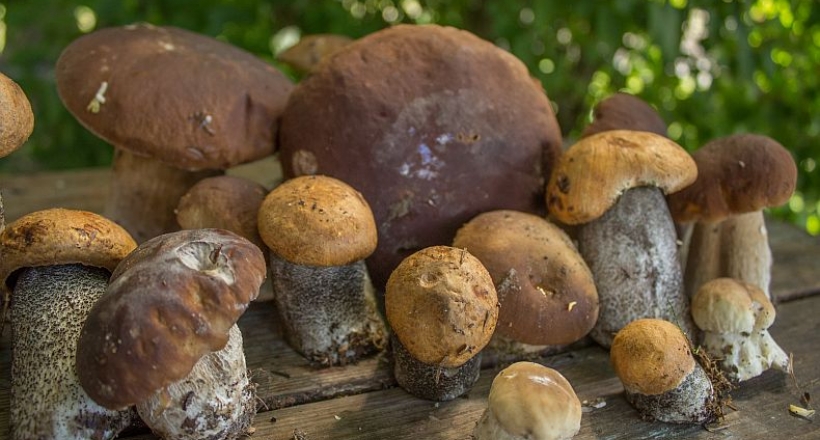
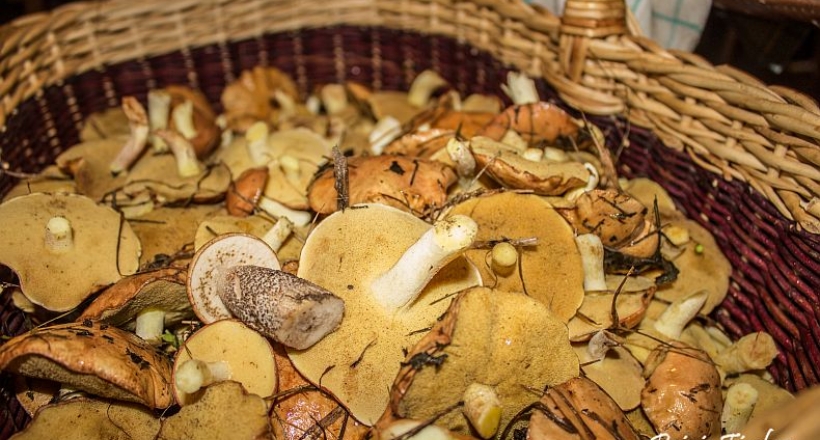
A few days ago I reported a photo story with a harvest of mushrooms from our backyard, then we gathered fungus called Slippery Jack, in today's Piece of Life series - a harvest from deepest woods of Courland (Latvia), meet Penny Bun & Red-Capped Scaber Stalk.And again, those mushrooms were actually gathered by my better part and not me. I was actually drilling holes in a stone wall meanwhile:Penny Buns and Red-Capped Scaber StalkRed Capped scaber stalk or Leccinum aurantiacum, is a species of fungus in the genus Leccinum. It is found in forests of Europe, North America and Asia and has a large, characteristically red-capped fruiting body. In North…
Beam Strengthening on Stone Wall - Building Bathroom from Scratch - Part 3
The never ending story with my adventures on home remodeling and building a bathroom continues. In todays part 3 I will tell you a brief photo story how I strengthened a beam on the stone wall.See part 1 and learn more how I actually concreted this stone wall, while in part 2 see how we actually installed first bearing beams above bathroom ceiling. I'm of course talking not only about bathroom, but about a stronger and stable house as well (as bathroom will be built later into this space)Tonight I didn't sleep, I was thinking all night along on how should I will replace outer wood walls with AAC blocks. Previous day I had bought masonry drill and special glue for concreting bolts (left from…
Mushrooms in backyard
The other day my aunt visited us at our country house, we spent some lovely time together, and while somewhere in the woods near Akmenrags lighthouse we hunted for chanterelle fungi, should I mention we found just enough to make a barely pan of sauce? The day my aunt left, my better part went for mushrooms again, this time at our backyard:Our backyardYes, the veggie garden in the boxes and skew barn as well. Wait, there is a rock garden also.Here is the catch from nearby pine coppice:Suillus luteusCommonly referred to as slippery jack or sticky bun in English-speaking countries, its names refer to the brown cap, which is characteristically slimy in wet…
Akmenrags Lighthouse
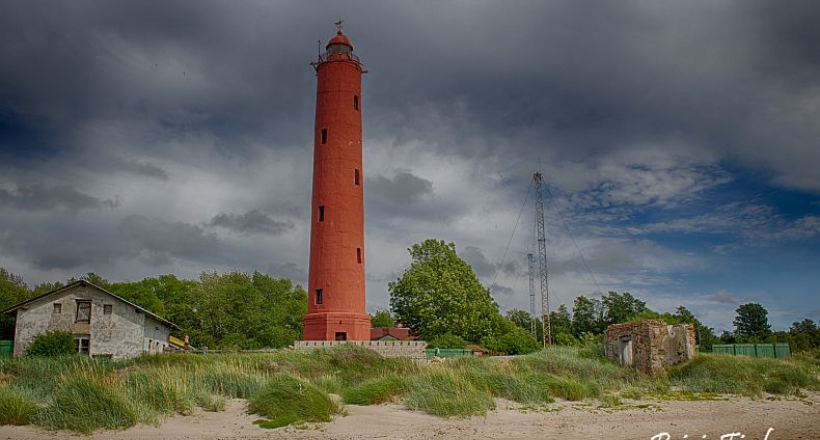
Akmenrags Lighthouse (Latvian: Akmeņraga bāka) - a lighthouse on the Latvian coast of the Baltic Sea, located to the south of the resort town of Pāvilosta.I first visited Akmensrags Lighthouse in the mid Summer of 2016 together with my aunt - we made a lovely excursion with her around Courland. Akmensrags lighthouse is located some 11 km south of the Pāvilosta, the road is not in the best shape (Breakstone road)There is a small museum/kiosk/ information center located in front of the lighthouse. When we approached lighthouse some people from kiosk asked what are we doing here. It seemed they enjoyed their loneliness and forgot that Akmensrags…
Another morning, another beatiful mist
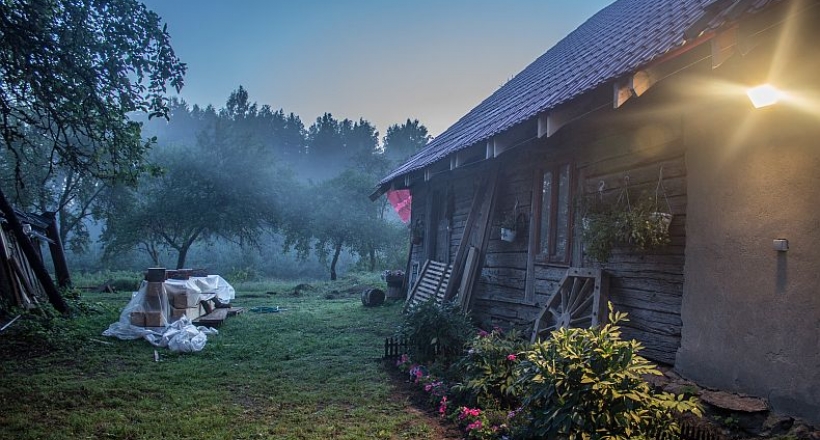
It seems I have a new tradition - for the second year in the row I have captured beautiful morning mist in our country house backyard.Alright, previous year my beloved did the shooting while I was dreaming about roof works. This time I couldn't sleep (as I was thinking of upcoming bathroom remodeling works), and I noticed - a mist. In our backyard. See it for yourself:Mist over our pond and neighbors meadowFew things have changed this year: we have freshly dug pond and neighbor have packed hay into plastic packages.Mist in our backyard territoryFew things have changed in this scene as well - first we have a new roof, second constructions works still continues, but instead of roof laths this…

Cats on The Rocks
Recently I featured a post about how we built a rock garden in the front of our country house. I reported a lovely sunset just shortly. In today's Piece of Life series - little creatures who enjoys the most of our new rock garden. Meet our lovely cats Tiger and Richard.Cat on the rockA nice observation place for planing an attack on...birds? Or at least a try.Cats on the rocksDouble attack?Cat on the rockAre you shooting me?
Red Sunset in our Rock Garden - Cool Evening Mood
This Summer spoiled us with a lovely sunsets, but one of the most empathic had been observed in front of our house at rock garden. Red/Orange Sunset at Rock GardenSee how we built this rock garden a few days ago.Country house during sunsetThere is still a lot of to do, and it will require a huge investment to completely remodel/rebuild this house, but evenings like this breaks it even.Sunset over pondYup, we dug this pond as well a few days ago.
Beam Replacement for Old house - Building Bathroom from Scratch - Part 2
Here comes another update on home remodeling works - building a bathroom from scratch. After I successfully concreted stone wall it was time to install new beams. For this side of house we did not had any beams installed (ok, they were, but they were rotted, as the roof was leaky, see how we changed a roof)A while ago I ordered beams at local sawmill (beams are 20cm X 20cm) and about 4 meter long. Today I called to the father and son (these guys are helping me out this year), and it was the matter of chainsaw, chisel and a little bit of math. Some stamina was required as well to lift those beams up.Installing beamsI didn't experimented with light paint photography today, so…

Our neighbor - Fox baby
For the second year in the row we have one small and lovely neighbor - baby fox. Once we met him at the bus stop, looked amazing - fox going to the city, the other morning bad farmers had mowed crop fields and baby fox seemed very disappointed.Today we met our friend, just wandering on the road.baby fox on the roadI wish I had a telephoto lens attached, to capture a lovely portrait, as the fox didn't seemed scared or so, just wandered.road and the foxPiece of Life after all!
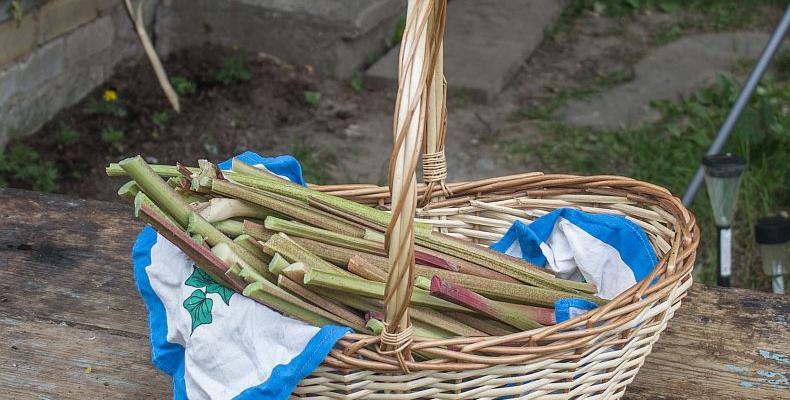
Making Rhubarb Wine
In our garden we have a lot of rhubarbs, one thing you can make out of them is a rhubarb cake, but turns out there is at least one more thing you can do with rhubarbs - you can try to make a wine. In today's Do It yourself series - my (our )attempt of making a rhubarb wine - I'm calling this an attempt - because we actually didn't make any wine this year. But if you are looking for a receipt on how to make a rhubarb wine, here is one: How to Make Rhubarb Wine at HomeRhubarbsAbove is our rhubarb harvest from our garden. First thing you will want to do - to remove leaves.Cleared rhubarbsA Swiss army knife is a great tool to help you to clear rhubarbs.Rhubarbs in the basketNext thing…
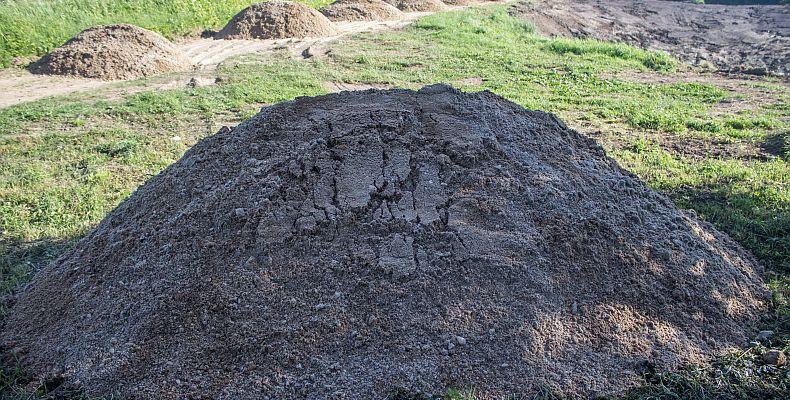
Gravel for road surface and rock garden
The other day I first met with one of our closet neighbors, he approached me and told me, that in couple of days he will cover road (we are sharing together) with a gravel. I already mentioned it in my previous post about pond works. I asked what kind of gravel does he is using for road surface, and decided it would be a good idea to have a little bit gravel for upcoming home foundation works (concreting). We agreed that he will give me a little bit gravel (I asked for about 1m3, but got some 3m3).Pile of gravelJust later I learnt, this gravel won't be suitable for concreting as it contains particles of clay.So we decided to use it later in shaping our upcoming rock garden.Piles of…
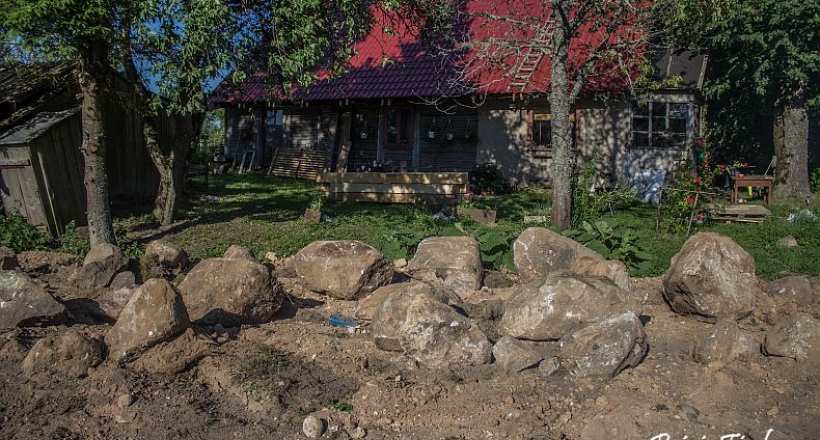
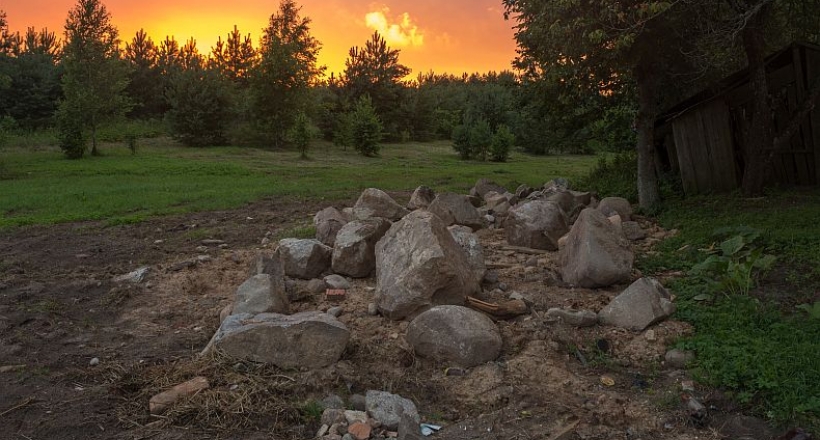
Building a Rock Garden
Today we made a rock garden from scratch, well almost. The thing is - idea to have a rock garden have always been in our minds, but we hadn't yet figured out how to solve the biggest question - rocks.We had already idea of place were rock garden will be situated (in front of house, were use to had been a dump - see: The Big Spring Territory Cleanup )Luckily after pond works were done, pond guy told he could help us with his New Holland excavator to do something else, and we agreed to take down that collapsed cowshed in front of house, it turned out there are huge rocks laid for the foundation. It was time to shape our rock garden using those huge rocks.Excavator taking down collapsed…
Building a foundation for a garden oven - Part 1
Idea to have a nice garden pizza oven were sit first already last year, together with the works we started shaping a form of our rural house, we recently inherited. Thus we had to wait for more than a year, before actually proceeding. The other day, while the pond guys were finishing digging pond, I dug some soil, to lay in the foundation for garden brick.Laying foundation for garden ovenWith the help of a shovel, I will dug off the ground surfaceShaping the form of foundationWe will go for a L for garden oven, attached with a sink and water (nice outdoor kitchen)Laying in bricksI'm using old clay bricks from the chimney we took down some time ago.Base foundation formed using old…
Pond Digging - Part 3 - The Result
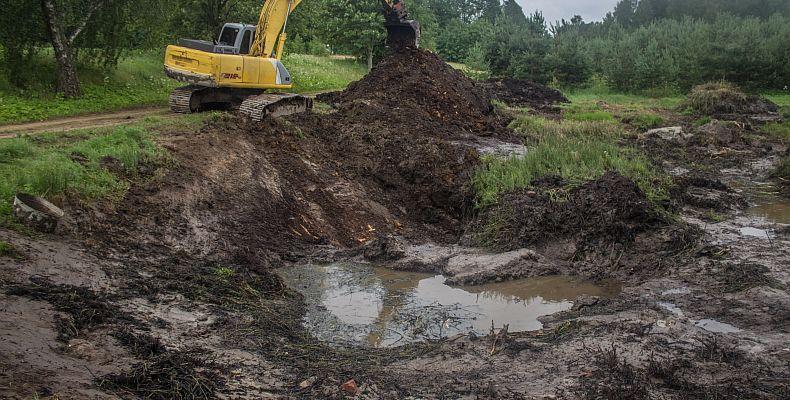
This morning started with a surprise, I was still sleeping, when my partner awakened me and told - pond guys are digging. I was surprised, because I didn't heard a sound. Maybe I was too tired from yesterday's pond draining or as it turned latter - the modern excavators are quiet. Anyway, I was not surprised at all - because when pond guys started, they didn't even informed me, see how it started in part 1.I made (more correct, my partner did it) my morning coffee and took my camera to document the progress.Excavator digging pond from the road sideI was a bit worried about the road, because we are sharing it with one another neighbor, and few days ago he informed us, that today he…
How to drain a pond with a pump and hose - Digging Pond - Part 2
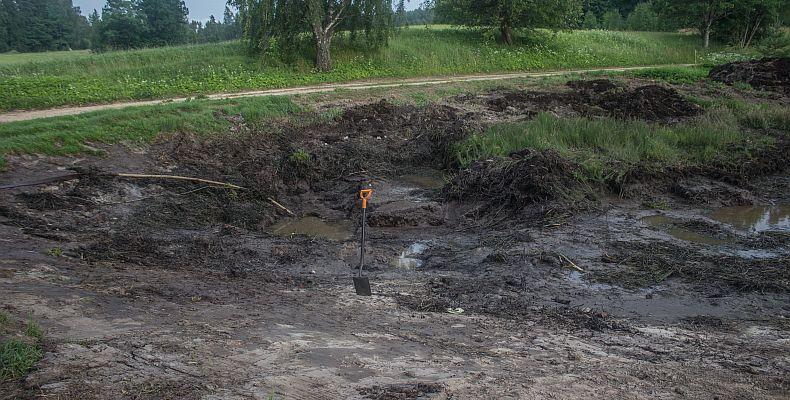
Today I had a chance to excel in pond works - I was left with no choice but to drain the pond. Luckily the pond guys brought an electric pump to make my life much easier. If you are new to home remodeling series, make sure you check out an article on how it all started about a year ago. And of course check out first part on pond digging, when we discovered that pond have been dug without our presence. Surprise pond digging in the middle of Summer.Now, pond guy phoned me and told me that it would be great that we should drain the pond, he will bring a pump and all I have to do - just to watch for the water level going down and turn of the pump once the works are done. In fact it turned…

Chasing Sunset Photography with a Strong Foreground (Pāvilosta / Jūrkalne)
Chasing sunset photography with a strong foreground is a brief story, which happened on the next day after Summer Solstice. We took our moms and a little doggie and decided to visit coastal Latvian beaches. At start we headed to Pāvilosta piers, I left girls wandering around while installed a tripod and thought I will make a few HDR's here. I have been into HDR photography since the day 1 I discovered this lovely technique back in Tbilisi. The rule of thumb for a great HDR is so called Golden hour - 30 minutes before sunrise/sunset to get interesting colors.Pāvilosta piersI have felt in love with the city of Pāvilosta since the day one I first visited it. Read my review of Pāvilosta…